Soon after buying the car, I noticed the condenser was getting beat up from bugs and rocks etc., that flew into the front air dam cavity unobstructed. I purchased the Carriage Works billet aluminum grille (powder coated black). Following is the install details.
**NOTE** I performed this on a two-post lift, but the same results could be had on jack-stands. The tool list is what I used, you might be able to substitute at your own descretion.
Tools Required:
Lift the car high enough to work on the grilled area without bending (unless you are under 30 then just lay on the ground lol).
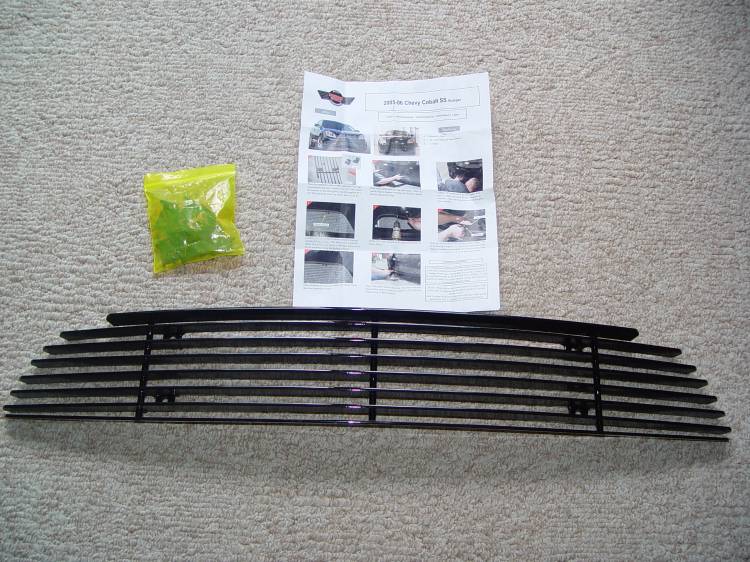
The grille comes with eight screws, eight u-clips made from spring steel, four l-brackets, the billet grille, and instructions.
I put the car up on a lift - you could do this on the ground as shown in the supplied instructions.

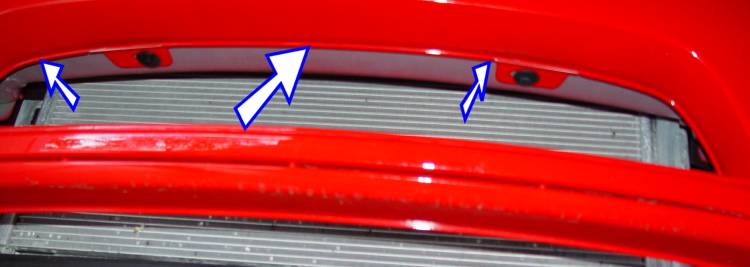
The Cobalt grille opening has a ridge running around the inside rearward lip. You will locate the grille against this lip.
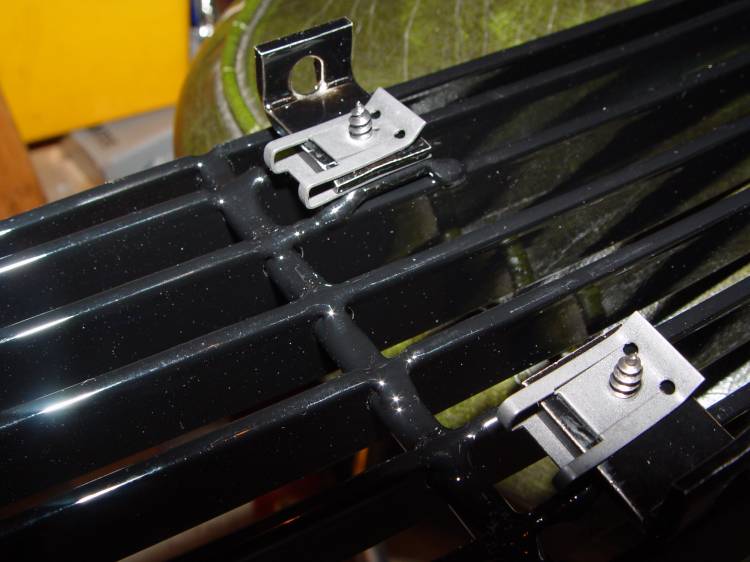
Position the l-brackets and the u-clips as shown onto the grille. You do this so you can position the grille in the opening and mark the holes to drill.
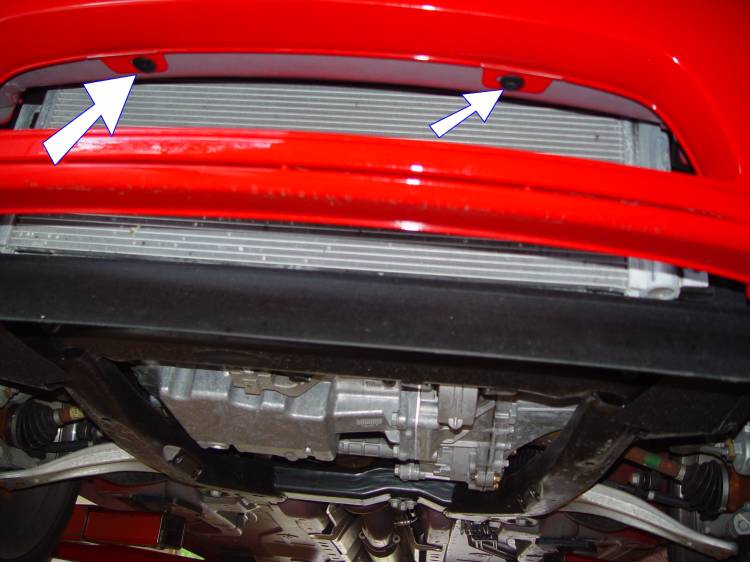
These two plastic rivets must be removed - gently pry the head of the pin downward and when it is about 3/4 of an inch pulled out, the rivet will fall out of the hole. Put aside for re-assembly later.
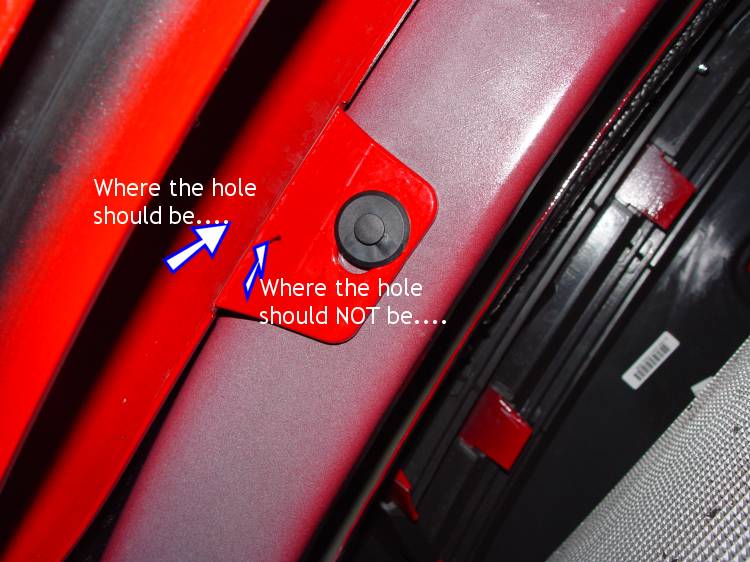
Position the grille into the opening, making sure the leading edge of the four l-brackets rest against the lip on the fascia opening shown in the previous image. If you push the grille too far , the holes will be marked on the tab where the plastic rivet lives. Not what you want. This pic shows the right hole location and the WRONG hole location.
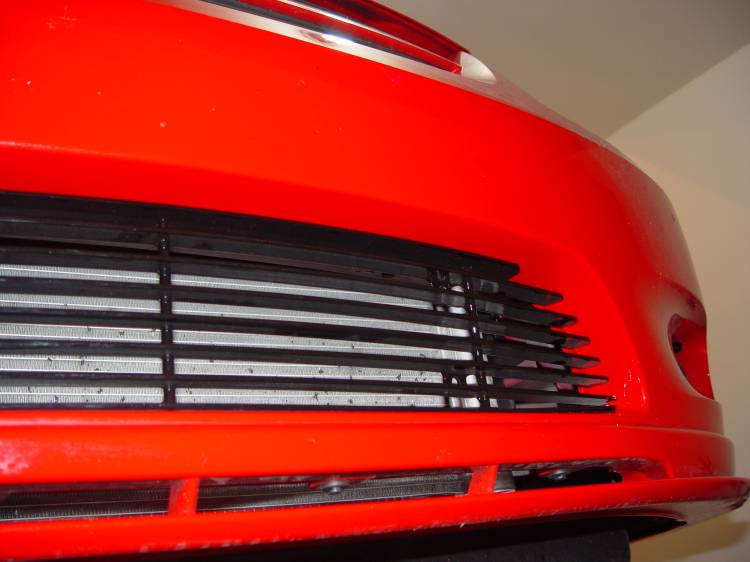
Here the grille is in place for marking the holes. Once your holes are marked, use the 3/16" drill bit to put four holes in the fascia to accomodate the mounting brackets of the grille. I was forced to put the spring clips entirely on the top of the fascia layer on the top holes, as the brackets interfered with the tabs for the plastic rivets. I just held the u-clip, flat side against the fascia on top of the hole, and screwed the screw in from the bottom through the bracket on the grille, through the fascia, and then into the clip. Not as good as I would have liked, but it works and looks perfect from the outside.
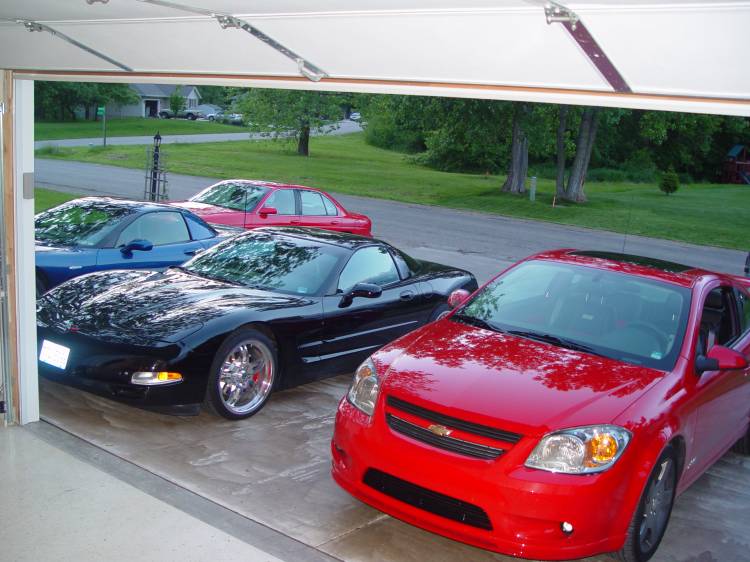
The grille in the car - parked outside with my Vettes and Lumina. I like the look of the new black grille, and now at least the raccoons and possums will be deflected out of the fascia on impact!
The quality of the Carriage Works grille is top-notch, the powder coat very thick and glossy. The customer service was very good also.
I do have to say that the brackets should have been moved outboard more to clear the tabs on the upper fascia mount, but I was able to make due and have a very nicley finished product. I would rate the grille an A-.